The Library > Authentication page allows you to set up authentication servers and create authentication rules with options for client-side Basic or Forms and server-side NTLM or BASIC.
Setting up Authentication – A Workflow
Please carry out the following steps as a minimum to apply Authentication to your service.
1. Create an Authentication Server.
2. Create an Authentication Rule that uses an Authentication Server.
3. Create a flightPATH rule that uses an Authentication Rule.
4. Apply the flightPATH rule to a Service
Authentication Servers
To set up a working authentication method, we must first set up an authentication server.
· Click the Add Server button.
· This action will produce a blank row ready for completion.
|
Option
|
Description
|
|
Name
|
Give your server a name for identification purposes – this name is used in the rules
|
|
Description
|
Add a description
|
|
Authentication Method
|
Choose an authentication method
LDAP – basic LDAP with usernames and passwords sent in clear text to the LDAP server.
LDAP-MD5 – basic LDAP with username in clear text and password MD5 hashed for increased security.
LDAPS – LDAP over SSL. Sends the password in clear text within an encrypted tunnel between the ADC and LDAP server.
LDAPS-MD5 – LDAP over SSL. The password is MD5 hashed for added security within an encrypted tunnel between the ADC and the LDAP server
|
|
Domain
|
Add in the domain name for the LDAP server.
|
|
Server Address
|
Add the IP address or hostname of the authentication server
LDAP – IPv4 address or hostname.
LDAP-MD5 – hostname only (IPv4 address will not work)
LDAPS – IPv4 address or hostname.
LDAPS-MD5 – hostname only (IPv4 address will not work).
|
|
Port
|
Use port 389 for LDAP and port 636 for LDAPS by default. No need to add the port number for LDAP and LDAPS. When other methods become available, you will be able to configure them here
|
|
Search Conditions
|
Search conditions must conform to RFC 4515. Example:
(MemberOf=CN=Phone- VPN,CN=Users,DC=mycompany,DC=local).
|
|
Search Base
|
This value is the starting point for the search in the LDAP database.
Example dc=mycompany,dc=local
|
|
Login Format
|
Use the login format you need.
Username – with this format chosen, you need only enter the username. Any user and domain information entered by the user is deleted, and the domain information from the server is used.
Username and Domain – The user must enter the whole domain and username syntax. Example: mycompany\gchristie OR someone@mycompany. The domain information entered at the server level is ignored.
Blank – the ADC will accept anything the user inputs and send it on to the authentication server. This option is used when using MD5.
|
|
Passphrase
|
This option is not used in this version.
|
|
Dead Time
|
Not used in this version
|
Authentication Rules
The next stage is to create the authentication rules for use with the server definition.

|
Field
|
Description
|
|
Name
|
Add a suitable name for your authentication rule.
|
|
Description
|
Add a suitable description.
|
|
Root Domain
|
This must be left blank unless you need single-sign-on across sub-domains.
|
|
Authentication Server
|
This is a drop-down box containing servers that you have configured.
|
|
Client Authentication:
|
Choose the value appropriate to your needs:
Basic (401) – This method uses the standard 401 authentication method
Forms – this will present the ADC default form to the user. Within the form, you can add a message. You can select a form that you have uploaded using the section below.
|
|
Server Authentication
|
Choose the appropriate value.
None – if your server does not have any existing authentication, select this setting. This setting means that you can add authentication abilities to a server that previously had none.
Basic – if your server has basic authentication (401) enabled, then select BASIC.
NTLM – if your server has NTLM authentication enabled, then select NTLM.
|
|
Form
|
Choose the appropriate value
Default – Selecting this option will result in the ADC using its built-in form.
Custom – you can add a form that you have designed and select it here.
|
|
Message
|
Add a personal message to the form.
|
|
Timeout
|
Add a timeout to the rule, after which the user will be required to authenticate again. Note the Timeout setting is only valid for Forms-based authentication.
|
Single Sign-On
If you wish to provide a single sign-on for users, complete the Root Domain column with your domain. In this example, we have used edgenexus.io. We can now have multiple services that will use edgenexus.io as the root domain, and you will only have to log in once. If we consider the following services:
· Sharepoint.mycompany.com
· usercentral.mycompany.com
· appstore.mycompany.com
These services can reside on one VIP or can be distributed across 3 VIPs. A user accessing usercentral.mycompany.com for the first time will be presented with a form asking them to log in depending on the authentication rule used. The same user can then connect to appstore.mycompany.com and will be authenticated automatically by the ADC. You can set the timeout, which will force authentication once this period of inactivity has been reached.
Forms
This section will enable you to upload a custom form.
How to create your custom form
Although the basic form the ADC provides is sufficient for most purposes, there will be occasions where companies wish to present their own identity to the user. You can create your custom form that users will be presented with to fill in in such cases. This form must be in either HTM or HTML format.
|
Option
|
Description
|
|
Name
|
form name = loginform
action = %JNURL%
Method = POST
|
|
Username
|
Syntax: name = “JNUSER”
|
|
Password:
|
name=”JNPASS”
|
|
Optional Message1:
|
%JNMESSAGE%
|
|
Optional Message2:
|
%JNAUTHMESSAGE%
|
|
Images
|
If you wish to add an image, then please add it in-line using Base64 encoding.
|
Example html code of a very basic and simple form
<HTML>
<HEAD>
<TITLE>SAMPLE AUTH FORM</TITLE>
</HEAD>
<BODY>
%JNMESSAGE%<br>
<form name=”loginform” action=”%JNURL%” method=”post“> USER: <input type=”text” name=”JNUSER” size=”20” value=””></br>
PASS: <input type=”password” name=”JNPASS” size=”20” value=””></br>
<input type=”submit” name=”submit” value=”OK“>
</form>
</BODY>
</HTML>
Adding a custom form
Once you have created a custom form, you can add it using the Forms section.
1. Choose a name for your form
2. Browse locally for your form
3. Click Upload
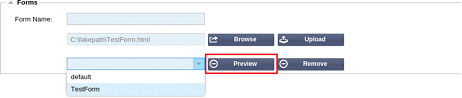
Previewing your custom form
To view the custom form that you have just uploaded, you select it and click Preview. You may also use this section to delete forms that are no longer required.
Cache
The ADC is capable of caching data within its internal memory and periodically flushes this Cache to the ADC's internal storage. The settings that manage this functionality are provided within this section.
Global Cache Settings
Maximum Cache Size (MB)
This value determines the maximum RAM that the Cache can consume. The ADC Cache is an in-memory cache that is also periodically flushed to the storage medium to maintain cache persistence after restarts, reboots, and shutdown operations. This functionality means that the maximum cache size must fit within the memory footprint of the appliance (rather than disk space) and should be no more than half of the available memory.
Desired Cache Size (MB)
This value denotes the optimum RAM to which the Cache will be trimmed. While the maximum cache size represents the absolute upper boundary of the Cache, the desired cache size is intended as the optimum size that the Cache should attempt to attain whenever an automatic or manual check on the cache size is made. The gap between the maximum and desired cache size exists to accommodate the arrival and overlap of new content between periodic checks on cache size to trim expired content. Once again, it may be more effective to accept the default value (30 MB) and periodically review the size of the Cache under "Monitor -> Statistics" for appropriate sizing.
Default Cache Time (D/HH:MM)
The value entered here represents the life of content without an explicit expiry value. The default caching time is the period for which content without a "no-store" directive or explicit expiry time in the traffic header is stored.
The field entry takes the form "D/HH:MM" – so an entry of "1/01:01" (default is 1/00:00) means to store the ADC will hold the content for one day, "01:00" for one hour, and "00:01" for one minute.
Cachable HTTP Response Codes
One of the cached data sets is HTTP responses. The HTTP response codes that are cached are:
· 200 – Standard response for successful HTTP requests
· 203 – Headers are not definitive but are gathered from a local or a 3rd party copy
· 301 – The requested resource has been assigned a new permanent URL
· 304 – Not modified since the last request & locally cached copy should be used instead
· 410 – Resource is no longer available at the server, and no forwarding address is known
This field should be edited with caution as the most common cacheable response codes are already listed.
Cache Checking Time (D/HH:MM)
This setting determines the time interval between cache trim operations.
Cache-Fill Count
This setting is a helper facility to help fill the Cache when a certain number of 304's have been detected.
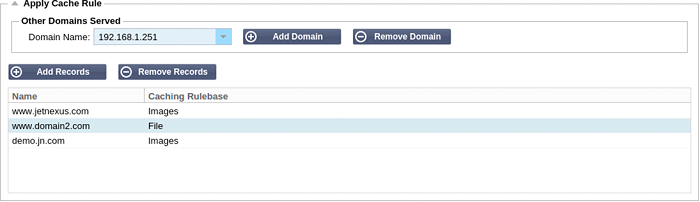
Apply Cache Rule
This section allows you to apply a cache rule to a domain:
· Add domain manually with the Add Records button. You must use a fully qualified domain name or an IP address in dotted-decimal notation. Example www.mycompany.com or 192.168.3.1:80
· Click the drop-down arrow and choose your domain from the list
· The list will be populated so long as traffic has passed through a virtual service and a caching strategy has been applied to the virtual service
· Choose your cache rule by double-clicking on the Caching Rulebase column and selecting from the list
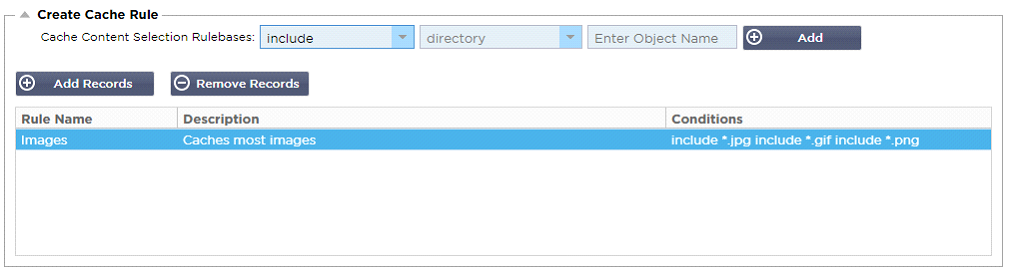
Create Cache Rule
This section allows you to create several different caching rules that can then be applied to a domain:
· Click Add Records and give your rule a name and description
· You can either type your conditions in manually or use the Add Condition
To add a condition using the Selection Rulebase:
· Choose Include or Exclude
· Choose All JPEG Images
· Click on the + Add symbol
· You will see that 'include *.jpg' has now been added to the conditions
· You can add more conditions. If you choose to do this manually, you need to add each condition on a NEW line. Please note that your rules will display on the same line until you click in the Conditions box then they will show on a separate line
flightPATH
flightPATH is the traffic management technology built into the ADC. flightPATH allows you to inspect HTTP and HTTPS traffic in real-time and perform actions based on conditions.
flightPATH rules must be applied to a VIP when IP objects are used within the rules.
A flightpath rule consists of four elements:
1. Details, where you define the flightPATH Name and Service to which it is attached.
2. Condition(s) that can be defined that cause the rule to be triggered.
3. Evaluation that allows the definition of variables that can be used within Actions
4. Actions that are used to manage what should happen when conditions are met
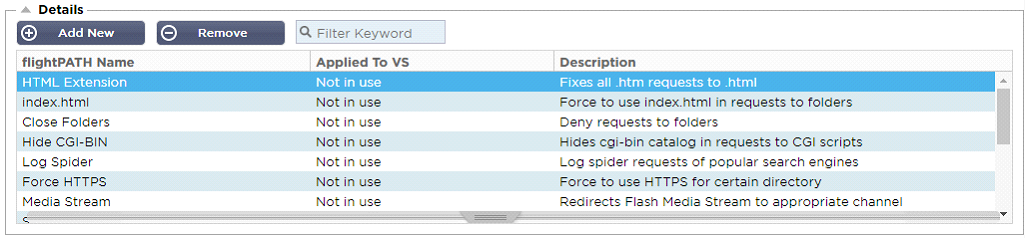
Details
The details section shows the available flightPATH rules. You can add new flightPATH rules and remove defined ones from this section.
Adding a new flightPATH rule

|
Field
|
Description
|
|
FlightPATH Name
|
This field is for the name of the flightPATH rule. The name you provide here appears in and is referenced within other parts of the ADC.
|
|
Applied to VS
|
This column is read-only and shows the VIP to which the flightPATH rule is applied.
|
|
Description
|
Value representing a description provided for readability purposes.
|
Steps to add a flightPATH rule
1. First, click the Add New button located in the Details section.
2. Enter a name for your rule. Example Auth2
3. Enter a description of your rule
4. Once the rule has been applied to a service, you will see the Applied To column auto-populate with an IP address and port value
5. Don't forget to hit the Update button to save your changes or if you make a mistake, just hit cancel revert to the previous state.
Condition
A flightPATH rule can have any number of conditions. The conditions work on an AND basis allow you to set the condition on which the action is triggered. If you want to use an OR condition, create an additional flightPATH rule and apply it to the VIP in the correct order.
You can also use RegEx by selecting Match RegEx in the Check field and the RegEx value in the Value field. The inclusion of RegEx evaluation extends the capability of flightPATH tremendously.
Creating a new flightPATH condition
Condition
We provide several Conditions as pre-defined within the drop-down and cover all foreseen scenarios. When new Conditions are added, these will be available through Jetpack updates.
Choices available are:
|
CONDITION
|
DESCRIPTION
|
EXAMPLE
|
|
<form>
|
HTML forms are used to pass data to a server
|
Example "form doesn't have length 0"
|
|
GEO Location
|
Compares the source IP address to the ISO 3166 Country Codes
|
GEO Location does equal GB, OR GEO Location does equal Germany
|
|
Host
|
Host extracted from the URL
|
www.mywebsite.com or 192.168.1.1
|
|
Language
|
Language extracted from the language HTTP header
|
This condition will produce a dropdown with a list of Languages
|
|
Method
|
Drop-down of HTTP methods
|
Drop-down that includes GET, POST, etc
|
|
Origin IP
|
If upstream proxy supports X-Forwarded-for (XFF) it will use the true Origin address
|
Client IP. It can also use multiple IPs or subnets.
10\.1\.2\.* is 10.1.2.0 /24 subnet
10\.1\.2\.3|10\.1\.2\.4 Use | for multiple IP’s
|
|
Path
|
Path of the website
|
/mywebsite/index.asp
|
|
POST
|
POST request method
|
Check data being uploaded to a website
|
|
Query
|
Name and value of a query, and can either accept the query name or a value also
|
"Best=jetNEXUS" Where the Match is Best and the Value is edgeNEXUS
|
|
Query String
|
The whole query string after the ? character
|
|
|
Request Cookie
|
Name of a cookie requested by a client
|
MS-WSMAN=afYfn1CDqqCDqUD::
|
|
Request Header
|
Any HTTP Header
|
Referrer, User-Agent, From, Date
|
|
Request Version
|
The HTTP version
|
HTTP/1.0 OR HTTP/1.1
|
|
Response Body
|
A user defined string in the response body
|
Server UP
|
|
Response Code
|
The HTTP code for the response
|
200 OK, 304 Not Modified
|
|
Response Cookie
|
The name of a cookie sent by the server
|
MS-WSMAN=afYfn1CDqqCDqUD::
|
|
Response Header
|
Any HTTP Header
|
Referrer, User-Agent, From, Date
|
|
Response Version
|
The HTTP version sent by the server
|
HTTP/1.0 OR HTTP/1.1
|
|
Source IP
|
Either the origin IP, proxy server IP, or some other aggregated IP address
|
Client
IP, Proxy IP, Firewall IP. Can also use multiple IP and subnets. You must escape the dots as these are RegEX. Example 10\.1\.2\.3 is 10.1.2.3
|
Match
The Match field can be either a drop-down or a text value and is definable depending on the value in the Condition field. For example, if the Condition is set to Host, the Match field is not available. If the Condition is set to <form>, the Match field is shown as a text field, and if the Condition is POST, the Match field is presented as a drop-down containing pertinent values.
Choices available are:
|
MATCH
|
DESCRIPTION
|
EXAMPLE
|
|
Accept
|
Content-Types that are acceptable
|
Accept: text/plain
|
|
Accept-Encoding
|
Acceptable encodings
|
Accept-Encoding: <compress | gzip | deflate | sdch | identity>
|
|
Accept-Language
|
Acceptable languages for response
|
Accept-Language: en-US
|
|
Accept-Ranges
|
What partial content range types this server supports
|
Accept-Ranges: bytes
|
|
Authorization
|
Authentication credentials for HTTP authentication
|
Authorization: Basic QWxhZGRpbjpvcGVuIHNlc2FtZQ==
|
|
Charge-To
|
Contains account information for the costs of the application of the method requested
|
|
|
Content-Encoding
|
The type of encoding used
|
Content-Encoding: gzip
|
|
Content-Length
|
The length of the response body in Octets (8-bit bytes)
|
Content-Length: 348
|
|
Content-Type
|
The mime type of the body of the request (used with POST and PUT requests)
|
Content-Type: application/x-www-form-urlencoded
|
|
Cookie
|
A HTTP cookie previously sent by the server with Set-Cookie (below)
|
Cookie: $Version=1; Skin=new;
|
|
Date
|
Date and time at message was originated
|
Date = “Date” “:” HTTP-date
|
|
ETag
|
An identifier for a specific version of a resource, often a message digest
|
ETag: “aed6bdb8e090cd1:0”
|
|
From
|
The email address of the user making the request
|
From: user@example.com
|
|
If-Modified-Since
|
Allows a 304 Not Modified to be returned if the content is unchanged
|
If-Modified-Since: Sat, 29 Oct 1994 19:43:31 GMT
|
|
Last-Modified
|
The last modified date for the requested object, in RFC 2822 format
|
Last-Modified: Tue, 15 Nov 1994 12:45:26 GMT
|
|
Pragma
|
Implementation: Specific headers that may have various effects anywhere along the request-response chain.
|
Pragma: no-cache
|
|
Referrer
|
Address of the previous web page from which a link to the currently requested page was followed
|
Referrer: HTTP://www.edgenexus.io
|
|
Server
|
A name for the server
|
Server: Apache/2.4.1 (Unix)
|
|
Set-Cookie
|
A HTTP cookie
|
Set-Cookie: UserID=JohnDoe; Max-Age=3600; Version=1
|
|
User-Agent
|
The user agent string of the user agent
|
User-Agent: Mozilla/5.0 (compatible; MSIE 9.0; Windows NT 6.1; WOW64; Trident/5.0)
|
|
Vary
|
Tells downstream proxies how to match future request headers to decide
whether the cached response can be used rather than requesting a fresh
one from the origin server
|
Vary: User-Agent
|
|
X-Powered-By
|
Specifies the technology (e.g. ASP.NET, PHP, JBoss) supporting the web application
|
X-Powered-By: PHP/5.4.0
|
Sense
The Sense field is a drop-down Boolean field and contains either Does or Doesn't choices.
Check
The Check field allows the setting of check values against the Condition.
Choices available are: Contain, End, Equal, Exist, Have Length, Match RegEx, Match List, Start, Exceed Length
|
CHECK
|
DESCRIPTION
|
EXAMPLE
|
|
Exist
|
This does not care for the detail of the condition just that it does/doesn't exist
|
Host — Does — Exist
|
|
Start
|
The string starts with the Value
|
Path — Does — Start — /secure
|
|
End
|
The string ends with the Value
|
Path — Does — End — .jpg
|
|
Contain
|
The string does contain the Value
|
Request Header — Accept — Does — Contain — image
|
|
Equal
|
The string does Equal the Value
|
Host — Does — Equal — www.jetnexus.com
|
|
Have Length
|
The string does have a length of the value
|
Host — Does — Have Length — 16
www.jetnexus.com = TRUE
www.jetnexus.co.uk = FALSE
|
|
Match RegEx
|
Enables you to enter a full Perl compatible regular expression
|
Origin IP — Does — Match Regex — 10\..* | 11\..*
|
Steps to add a Condition
Adding a new flightPATH Condition is very easy. An example is shown above.
1. Click the Add New button within the Condition area.
2. Choose a condition from the drop-down box. Let's take Host as an example. You can also type into the field, and the ADC will show the value in a drop-down.
3. Choose a Sense. For example, Does
4. Choose a Check. For example, Contain
5. Choose a value. For example, mycompany.com
The above example shows that there are two conditions that both have to be TRUE for the rule to complete
· The first is checking that the requested object is an image
· The second checks whether the host in the URL is www.imagepool.com
Evaluation
The ability to add definable variables is a compelling capability. Regular ADC's offer this capability using scripting or command-line options that are not ideal for anyone. The ADC allows you to define any number of variables using an easy-to-use GUI, as shown and described below.
flightPATH variable definition comprises four entries that need to be made.
· Variable – this is the name of the variable
· Source – a drop-down list of possible source points
· Detail – select values from a drop-down or manually typed.
· Value – the value that the variable holds and can be an alphanumeric value or a RegEx for fine-tuning.
Built-in Variables:
Built-In variables have already been hardcoded, so you do not need to create an evaluation entry for these.
You can use any of the variables listed below in the Action section.
The explanation for each variable is located in the "Condition" table above.
· Method = $method$
· Path = $path$
· Querystring = $querystring$
· Sourceip = $sourceip$
· Response code (text also included “200 OK”) = $resp$
· Host = $host$
· Version = $version$
· Clientport = $clientport$
· Clientip = $clientip$
· Geolocation = $geolocation$”
|
ACTION
|
TARGET
|
|
Action = Redirect 302
|
Target = HTTPs://$host$/404.html
|
|
Action = Log
|
Target = A client from $sourceip$:$sourceport$ has just made a request $path$ page
|
Explanation:
· A client accessing page that does not exist would ordinarily be presented with the browser’s 404 Error page
· Instead, the user is redirected to the original hostname they used, but the incorrect path is replaced with 404.html
· An entry is added to the Syslog saying, "A client from 154.3.22.14:3454 has just requested the wrong.html page."
Action
The next stage in the process is to add an action associated with the flightPATH rule and condition.
In this example, we want to rewrite the path portion of the URL to reflect the URL typed by the user.
· Click Add New
· Choose Rewrite Path from the Action drop-down menu
· In the Target field, type in $path$/myimages
· Click Update
This action will add /myimages to the path, so the final URL becomes www.imagepool.com/myimages
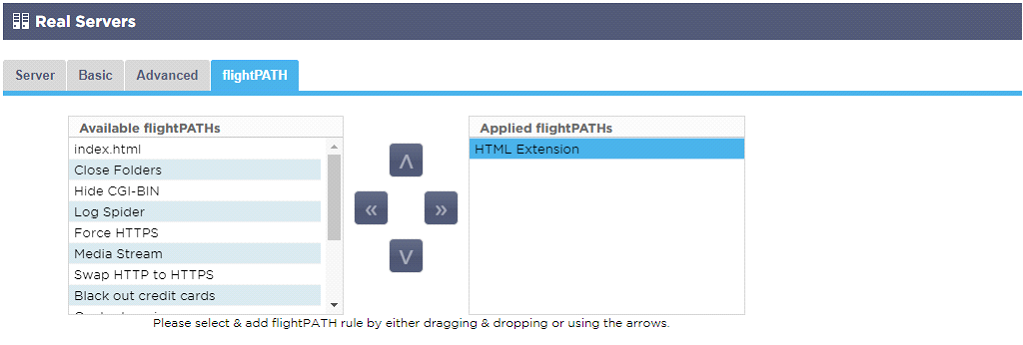
Applying the flightPATH rule
The application of any flightPATH rule is made within the flightPATH tab of each VIP/VS.
· Navigate to Services > IP Services and choose the VIP to which you wish to assign the flightPATH rule.
· You will see the Real Server list shown below
· Click on the flightPATH tab
· Select the flightPATH rule you have configured or one of the pre-built ones supported. You can select multiple flightPATH rules if required.
· Drag and drop the selected set to the Applied flightPATHs section or click the >> arrow button.
· The rule will be moved to the right side and automatically applied.