Clustering
The ADC can be used as a single stand-alone device, and it will work perfectly well doing that. However, when one considers that the purpose of the ADC is to load balance sets of servers, the need to cluster the ADC itself becomes apparent. The ADC’s easily navigable UI design makes the configuration of the clustering system straightforward.
The System > Clustering page is where you will configure the high availability of your ADC appliances. This section is organized into several sections.
Important Note
· There is no requirement for a dedicated cable between the ADC pair to maintain a high availability heartbeat.
· The heartbeat takes place on the same network as the Virtual Service that requires high availability to be put in place.
· There is no stateful fail-over between the ADC appliances.
· When high availability is enabled on two or more ADC’s, each box will broadcast via UDP the Virtual Services it is configured to provide.
· High availability fail-over uses unicast messaging and Gratuitous ARP to inform the new Active load balancer switches.
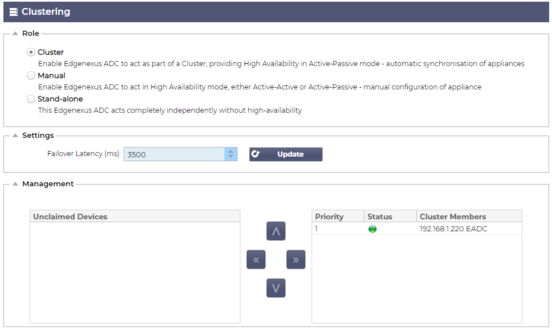
Role
There are three cluster roles available when you configure the ADC for high availability.
Cluster

· By default, a new ADC will power on using the Cluster role. In this role, each cluster member will have the same “working configuration,” and as such, only one ADC in the Cluster will be Active at any one time.
· A “working configuration” means all configuration parameters, except items that need to be unique such as the management IP address, ALB Name, network settings, interface details, and so on.
· The ADC in priority 1, the topmost position, of the Cluster Members box is the Cluster Owner and the Active load balancer, while all other ADC’s are Passive members.
· You can edit any ADC in the Cluster, and the changes will be synchronized to all Cluster members.
· When you remove an ADC from the Cluster, all Virtual Services will be deleted from that ADC.
· You cannot remove the last member of the Cluster to Unclaimed Devices. To remove the last member, please change the role to Manual or Stand-alone.
· The following objects are not synchronized:
o Manual Date & Time section – (NTP Section is synchronized)
o Failover Latency (ms)
o Hardware section
o Appliance section
o Network section
Failure of the Cluster Owner
· When a cluster owner fails, one of the remaining members will automatically take over and carry on load balancing the traffic.
· When the cluster owner returns, it will resume load balancing traffic and take over the owner role.
· Let’s assume the Owner has failed, and a Member has taken over the load balancing. If you would like that Member that has taken over load balancing traffic to become the new owner, highlight the member and click the up arrow to move it to the Priority 1 position.
· If you edit one of the remaining cluster members and the owner is down, the edited member will automatically promote itself to the owner without loss of traffic
Changing role from Cluster role to Manual role
· If you wish to change the role from Cluster to Manual, click the radio button next to the Manual role option
· After you click the radio button, you will see the following message:

· Click the OK button
· Check the Virtual Services section. You will find that the Primary column now shows an unticked box.
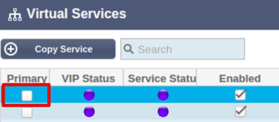
· It is a safety feature and means that if you have another ADC with the same Virtual Services, then there will be no interruption to traffic flow.
Changing role from Cluster to Stand-alone
· If you wish to change the role from Cluster to Stand-alone, click on the radio button next to the Standalone option.
· You will be prompted with the following message:

· Click OK to change roles.
· Check your Virtual Services. You will see that the Primary column change name to Stand-alone
· You will also see that all the Virtual Services are disabled (un-ticked) for safety reasons.
· Once you are confident that no other ADC on the same network has duplicate Virtual Services, you can enable each one in turn.
Manual Role
An ADC in the Manual role will work with other ADC’s in the Manual role to provide high availability. The main advantage over the Cluster role is the ability to set which ADC is Active for a Virtual IP. The disadvantage is that there is no configuration synchronization between the ADC’s. Any changes must be replicated manually on each box via the GUI, or for lots of changes, you can create a jetPACK from one ADC and send this to the other.
· To make a Virtual IP address “Active”, tick the checkbox in the primary column (IP Services page)
· To make a Virtual IP address “Passive”, leave the check-box blank in the primary column (IP Services page)
· In the event, an Active service fails over to the Passive:
o If both Primary Columns are ticked, then an election process takes place, and the lowest MAC address will be Active
o If both are un-ticked, then the same election process takes place. In addition, if both are un-ticked, there is no automatic fallback to the original Active ADC
Stand-alone Role
An ADC in the Stand-alone role will not communicate with any other ADC regarding its services, and therefore all Virtual Services will remain in the Green status and connected. You must ensure that all Virtual Services have unique IP addresses, or there will be a clash on your network.
Settings

In the Settings section, you can set the Failover Latency in milliseconds, the time that a Passive ADC will wait before taking over the Virtual Services after the Active ADC has failed.
We recommend setting this to 10000ms or 10 seconds, but you may decrease or increase this value to suit your network and requirements. Acceptable values fall between 1500ms and 20000ms. If you experience instability in the cluster at a lower latency, you should increase this value.
Management
In this section, you can add and remove cluster members while also changing the priority of an ADC in the cluster. The section consists of two panels and a set of arrow keys in between. The area on the left is the Unclaimed Devices, while the rightmost area is the Cluster itself.
Adding an ADC to the cluster
· Before adding the ADC to the cluster, you must ensure that all the ADC appliances have been provided with a unique name set in the System > Network section.
· You should see the ADC as Priority 1 with Status green and its name under the Cluster Members column in the management section. This ADC is the default primary appliance.
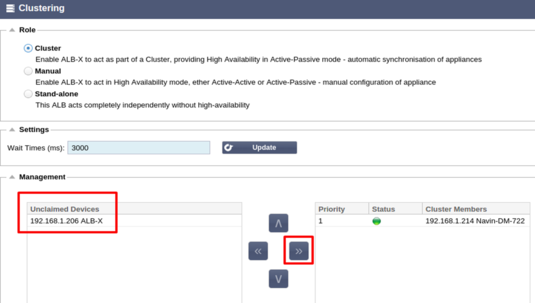
· All the other available ADC’s will show up in the Unclaimed Devices window within the management section. An Unclaimed Device is the ADC that has been assigned in the Cluster Role but has no Virtual Services configured.
· Highlight the ADC from the Unclaimed Devices window and click the right arrow button.
· You will now see the following message:
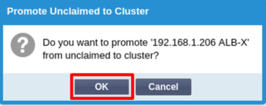
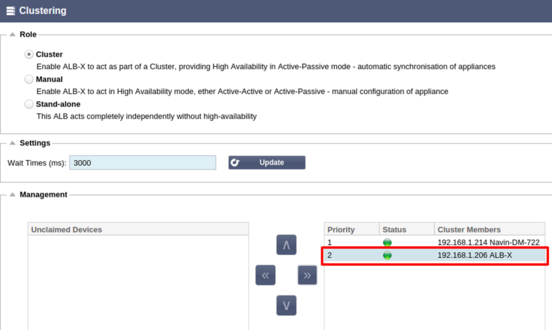
· Click OK to promote the ADC to the cluster.
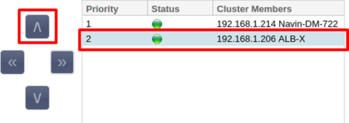
· Your ADC should now be showing as Priority 2 in the cluster members list.
Removing a cluster member
· Highlight the Cluster Member you wish to remove from the cluster.
· Click the left arrow button.
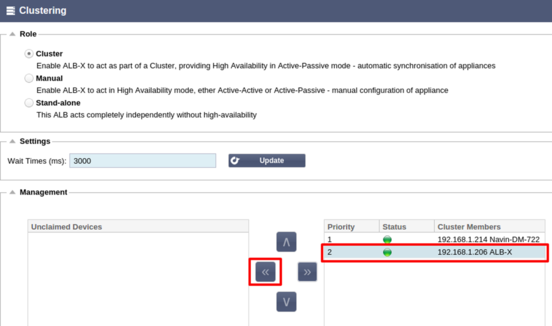
· You will be presented with a confirmation request.
· Click OK to confirm.
· Your ADC will be removed and be shown on the Unclaimed Devices side.
Changing the priority of an ADC
There may be times when you wish to change the priority of an ADC within the members' list.
· The ADC at the top of the Cluster Members list is given Priority 1 and is the Active ADC for all Virtual Services
· The ADC that is second in the list is given Priority 2 and is the Passive ADC for all Virtual Services
· To change which the ADC is Active simply highlight the ADC and click the up arrow until it is at the top of the list