Creating the ADC Virtual Machines
Now comes the main step – creating the EdgeADC virtual machines. We will be creating two virtual machines, both in the same region and zone.
In the main portal, click the Virtual machines icon.
In the next screen click on the Create menu and select Azure virtual machine from the dropdown.
You will now come to the pages where you set up your virtual machine for the EdgeADC.
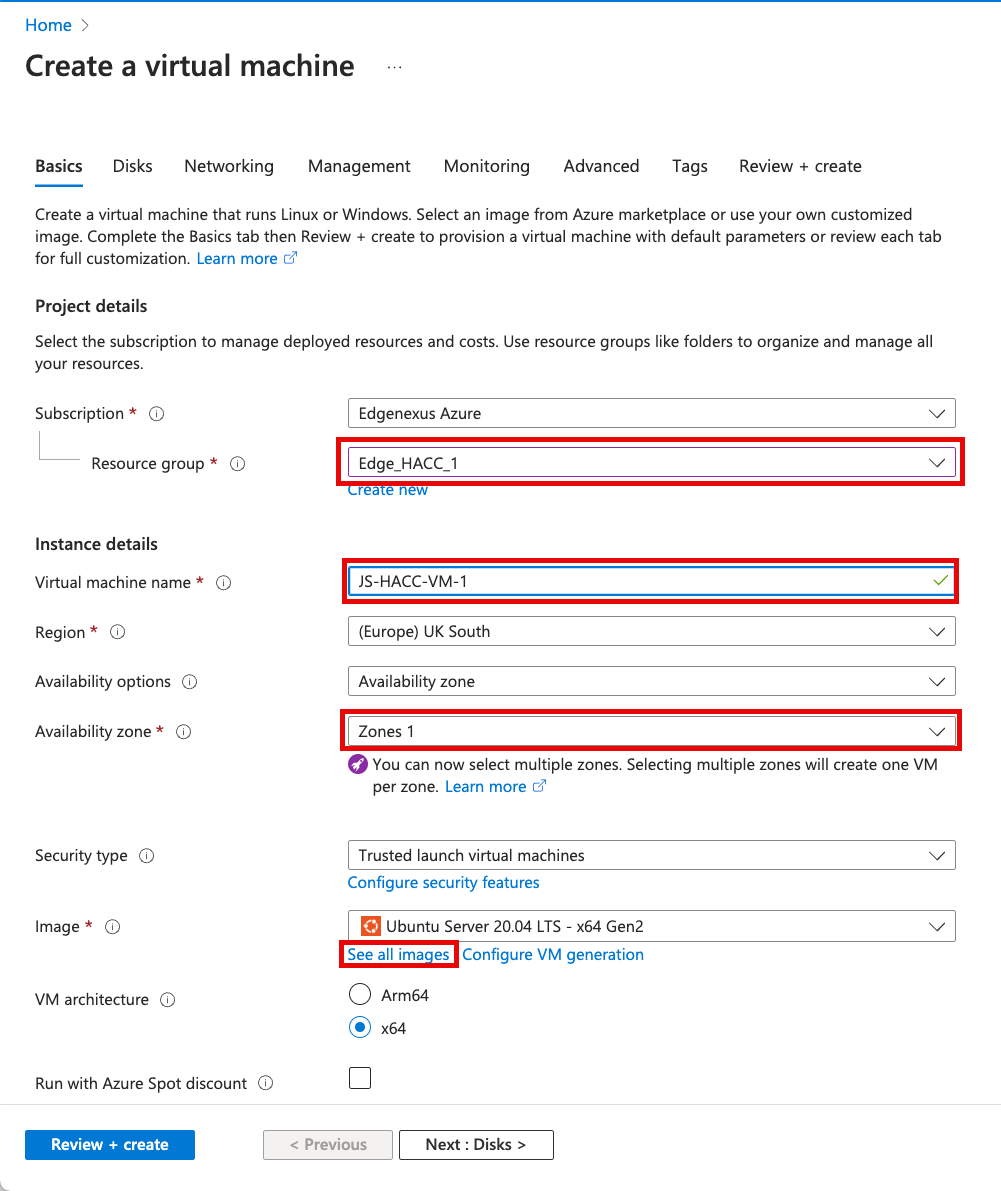
This is the first page of the VM setup. In the image above, we have indicated the fields that need to be selected.
· Select the Resource Group for ADC1 VM
· Give it a VM name of your choice
· Choose the Region and Zone – Need to be in the same region and zone
· Choose Standard as the Security type
· Click the See all images link.
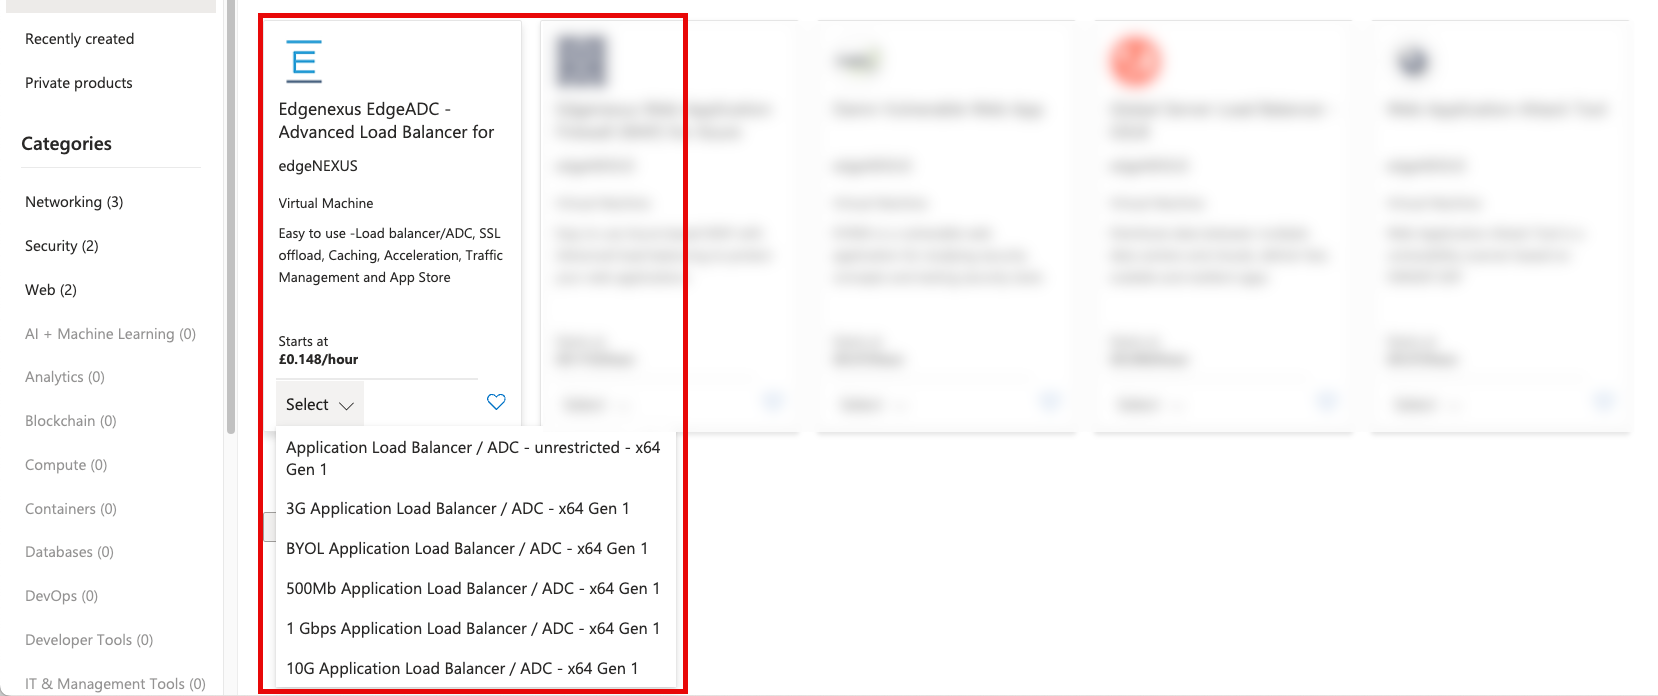
· When the Marketplace comes up, search for Edgenexus
· Choose the type of EdgeADC licensing model you need.
If you are installing your own license purchased from Edgenexus, choose the BYOL option, otherwise choose one of the times/sized license options.
· You will then be taken back to the virtual machine creation page.
· Click the Next: Disks button.
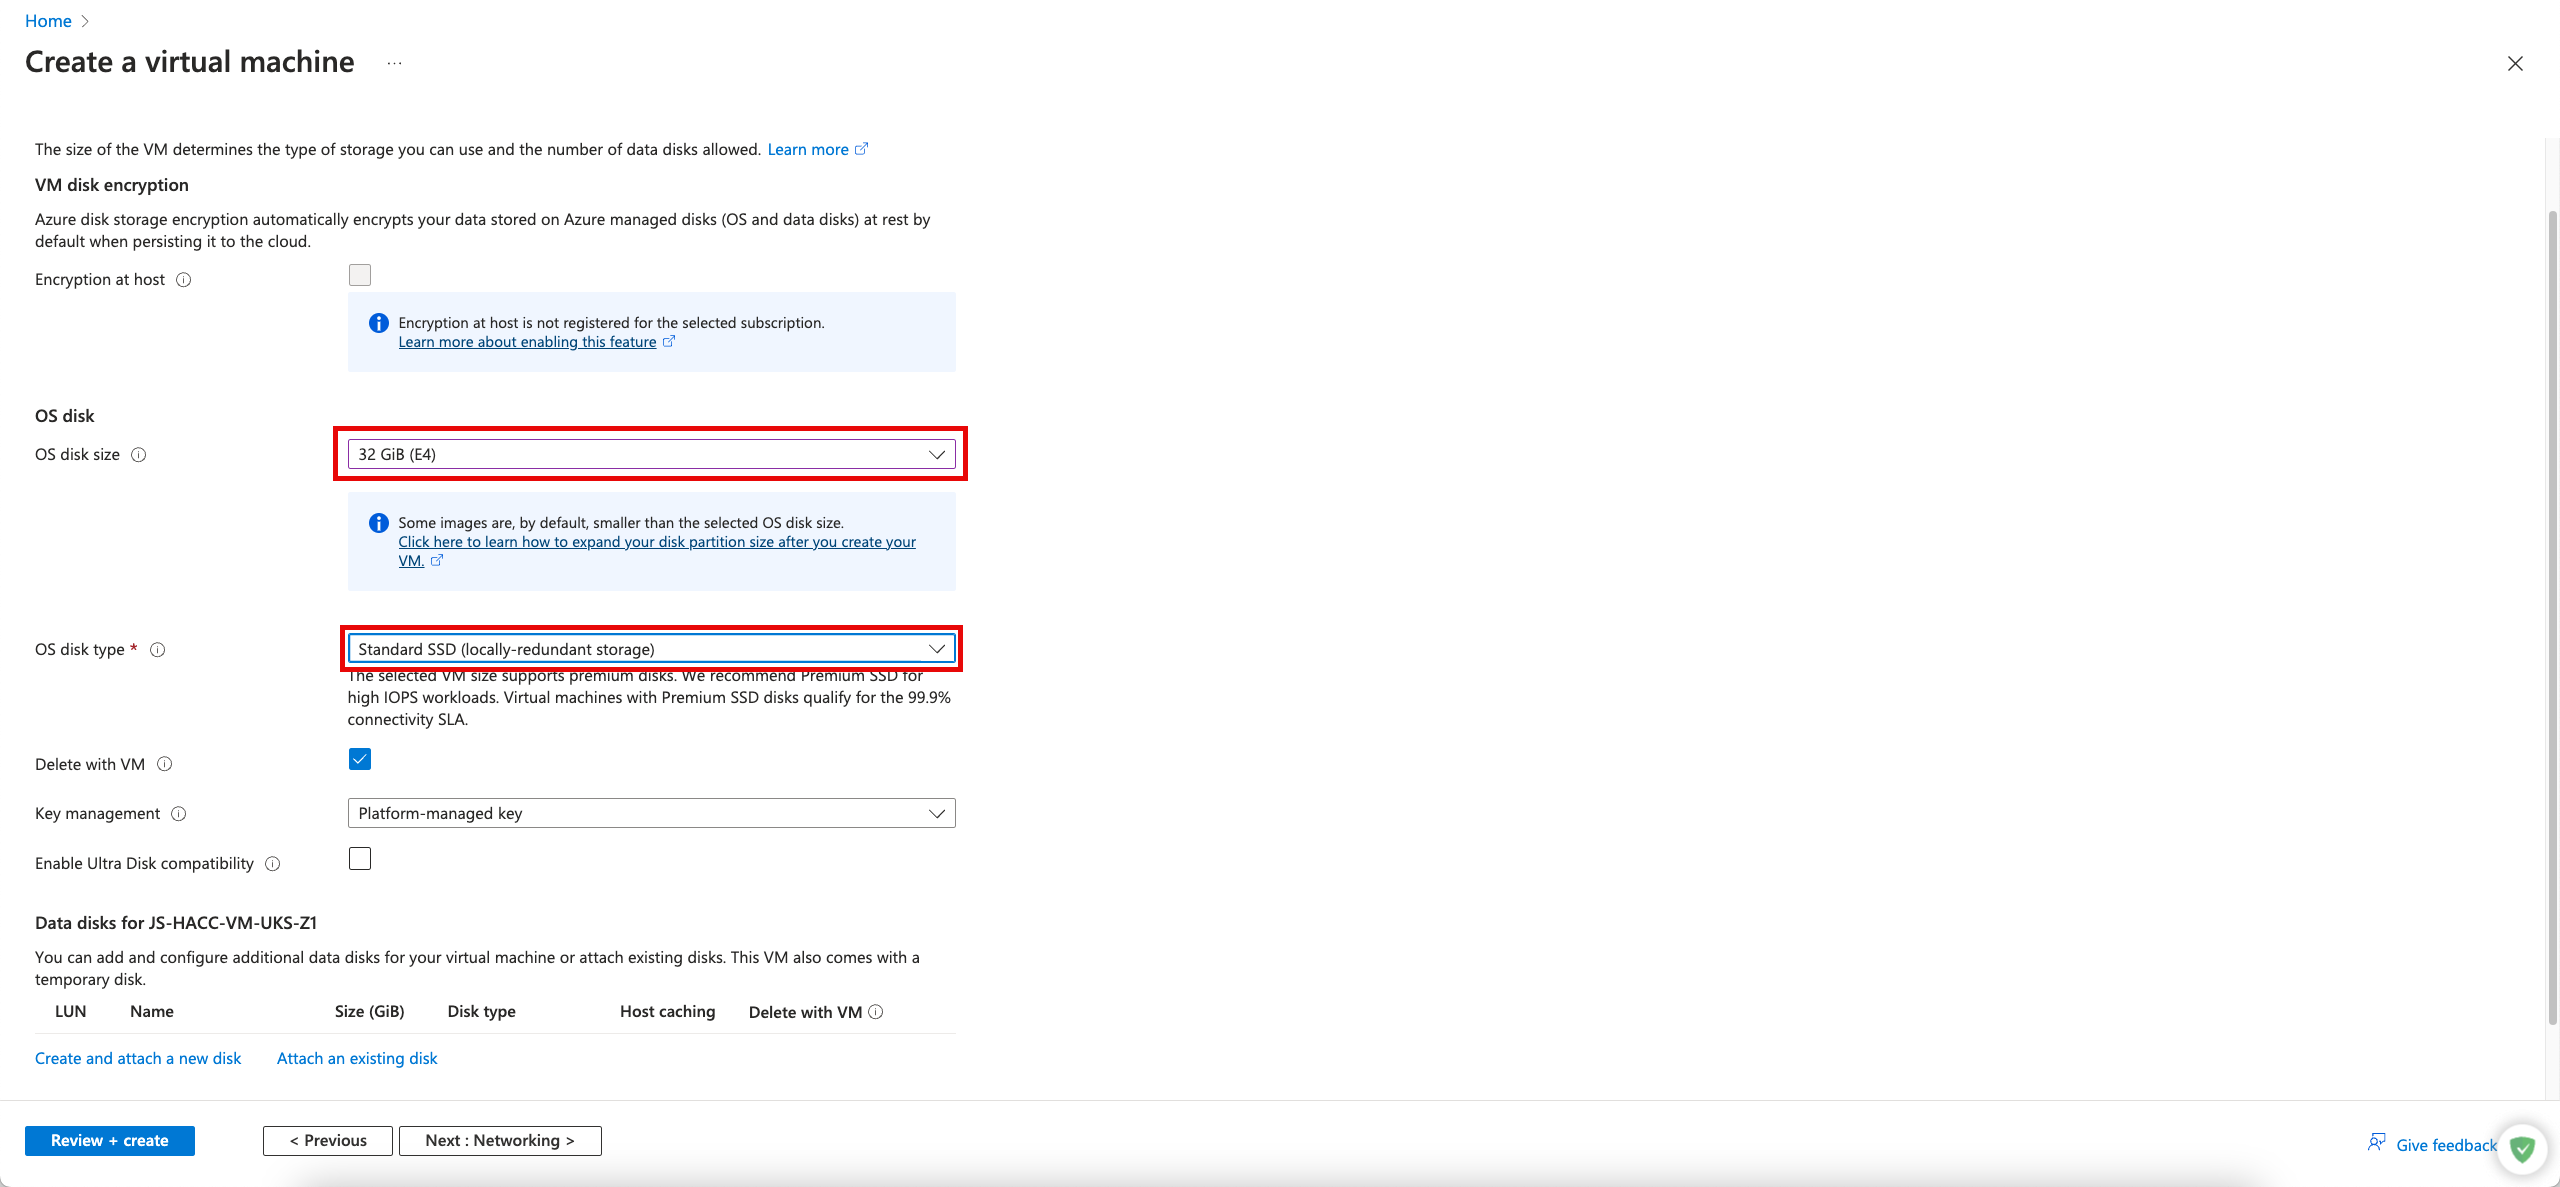
· On the Disks page we have highlighted the options need changing.
· Choose the Disk size (we recommend 40GB but the nearest is 64GB).
· Choose the OS Disk Type as Standard SSD.
· Click Next: Networking.
· You can skip the Management page unless you wish to use it. Click Next: Monitoring.
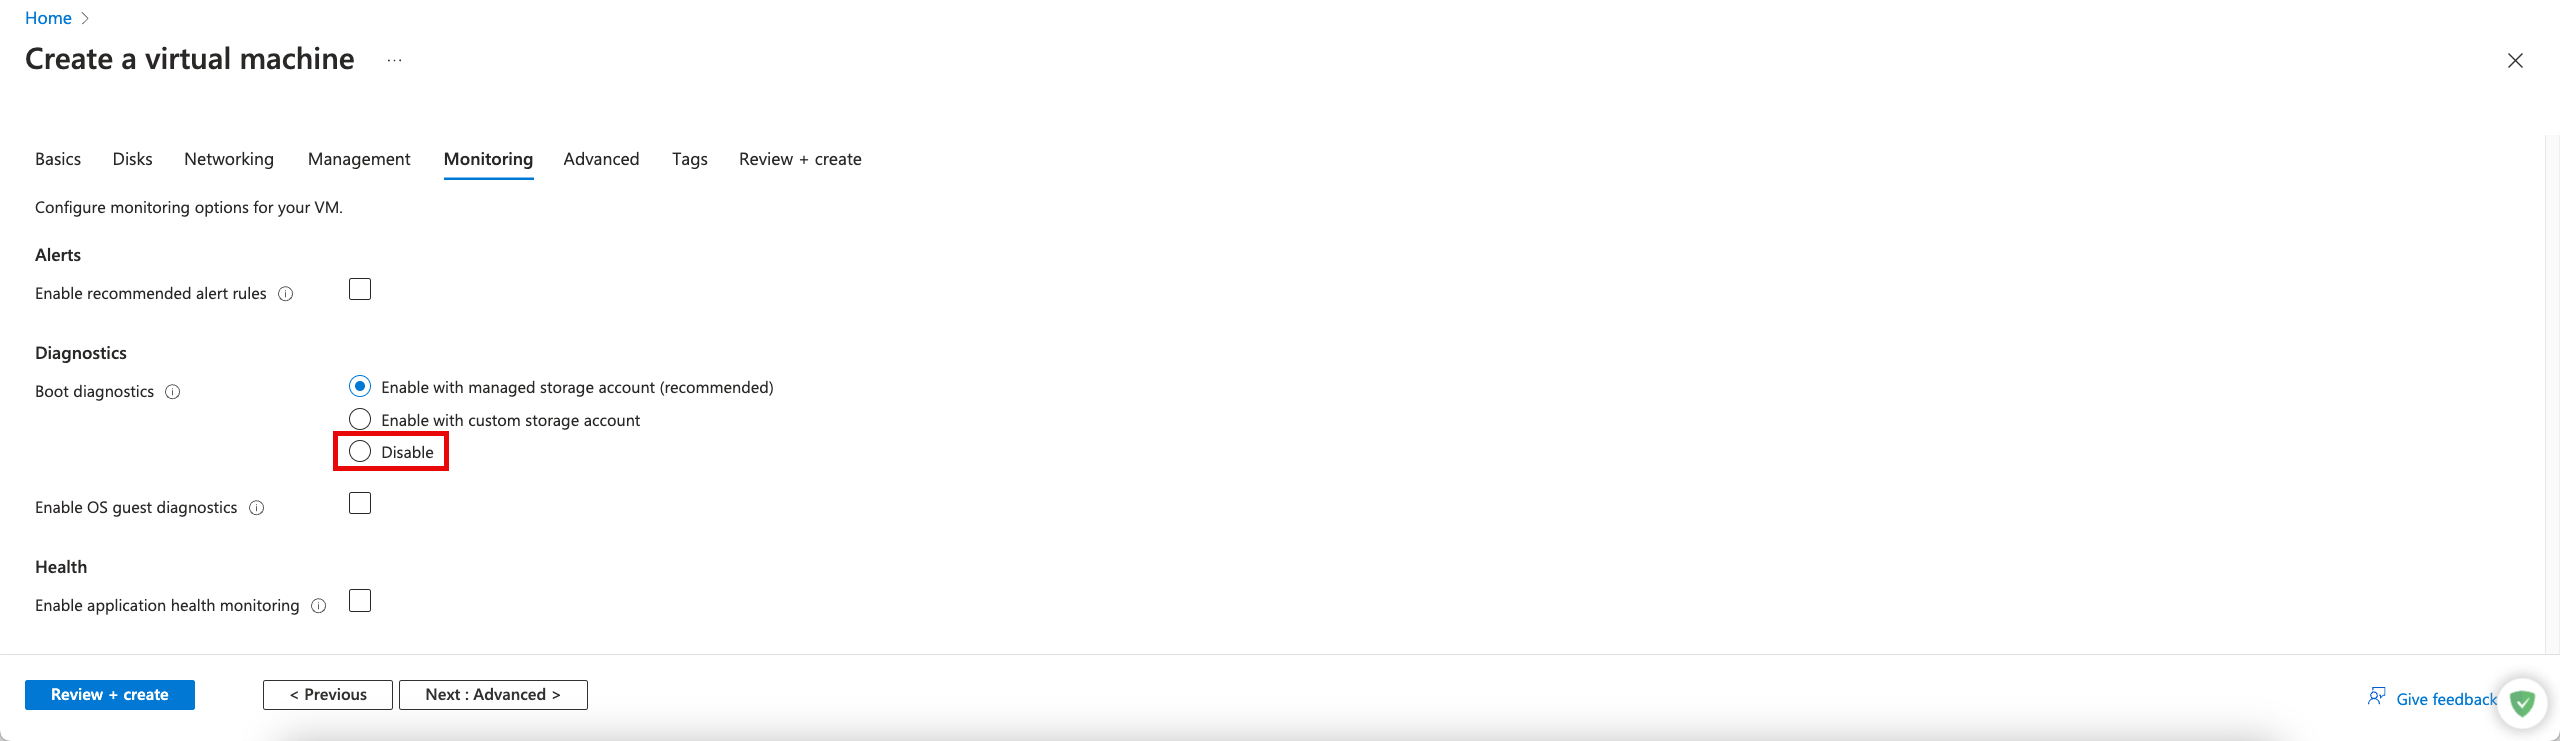
· Unless you wish to use Monitoring, we suggest clicking the Disable option.
· Click on the Review & create button as we have no need to do anything on the Advanced page.
The ADC VM will now be created.
NOTE: These steps will need to be repeated to create the second ADC VM.